
Table of Contents
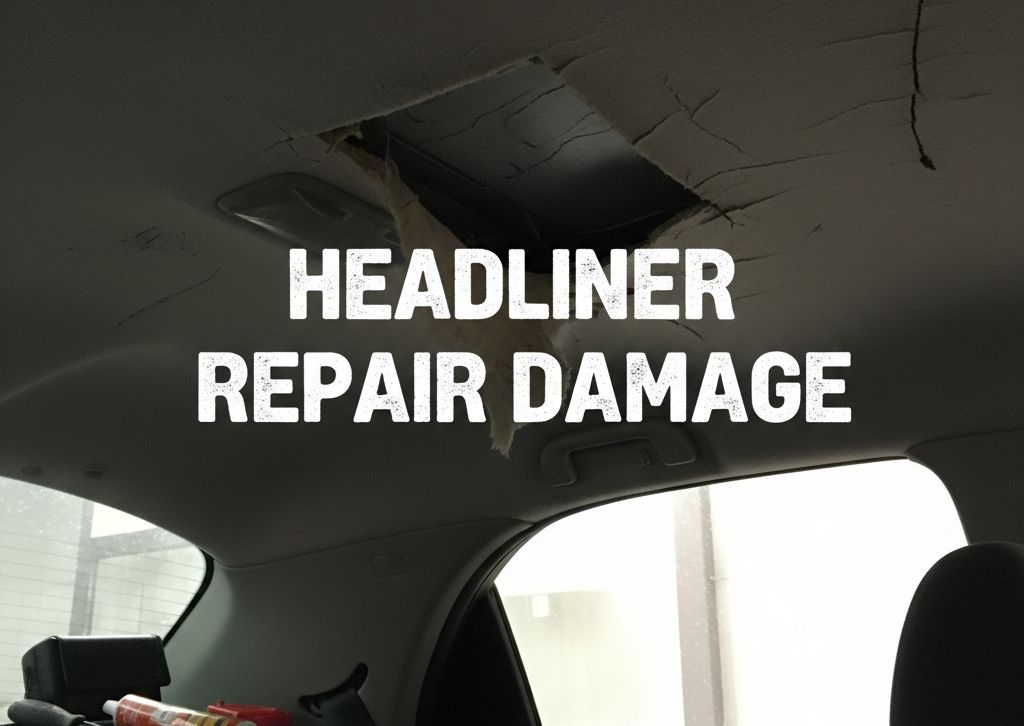
Headliner repair may not sound like a top priority, but once the fabric above your head starts sagging or drooping, it quickly becomes impossible to ignore. The car’s ceiling fabric—known as the headliner—can separate from its foam backing due to heat, moisture, or age. This sagging doesn’t just ruin the car’s aesthetics; it can obstruct your view, cause unpleasant odors, and even lower your vehicle’s resale value.
Whether you’re a DIY enthusiast or someone just tired of that “falling roof look,” fixing your headliner can restore your interior and make your car feel new again. But not all repair methods are created equal. In this guide, we’ll rank five common headliner fixes, from the worst (temporary) to the best (long-lasting and professional)—so you can decide which method is worth your time and money.
Why Do Headliner repair Sag or Fall?
Before diving into the fixes, it’s important to understand why this happens. Car manufacturers use a foam backing to hold the fabric in place. Over time, this foam degrades—especially in hot, humid environments. The adhesive holding it weakens, and gravity does the rest.
Common causes include:
- Prolonged heat exposure
- Moisture or roof leaks
- Smoking inside the car
- Low-quality adhesives
- Simple aging of materials
Knowing the cause can help you prevent the problem from returning after repair.
5 Bad to Best Fixes for a Sagging Headliner repair
Below are five popular methods to fix a sagging or detached Headliner repair—ranked from least effective to most durable.
Fix #1: Thumbtacks and Staples (Bad but Fast)
Let’s start with the quickest but ugliest option: thumbtacks, staples, or pushpins. These are the classic “bad fix” methods people use when they just want the fabric off their head.
How it’s done:
- Push thumbtacks or staples into the sagging area to hold the fabric in place.
- Space them evenly to avoid wrinkles or bunching.
Pros:
- Extremely cheap and instant results
- Requires no tools or materials
Cons:
- Looks unprofessional and sloppy
- Can cause tears or holes in the fabric
- Doesn’t address the root problem
Verdict: A temporary fix at best. Works for emergencies, but it will need a proper repair soon.
Fix #2: Double-Sided Tape or Glue (Quick but Messy)
A step up from tacks, some car owners use double-sided tape or liquid glue to reattach sagging fabric. This seems clever, but it usually leads to a sticky mess.
How it’s done:
- Apply tape or glue between the liner fabric and roof board.
- Press the material evenly and allow it to set.
Pros:
- Affordable and relatively simple
- Better appearance than thumbtacks
Cons:
- Tape loses grip quickly in heat
- Glue can bleed through or stain fabric
- Hard to get smooth, wrinkle-free results
Verdict: Slightly better than thumbtacks, but still a short-term patch. Use this only if you plan to replace the liner later.
Fix #3: Steam and Paint Roller (Moderate and Temporary)
This method reactivates the old adhesive using steam. You can use a handheld steamer or even a steam iron (on low heat). Then, press the fabric back with a paint roller for a smooth finish.
How it’s done:
- Steam the sagging section evenly.
- Use a roller or clean cloth to press the fabric back into place.
- Let it dry completely before driving.
Pros:
- Gentle and less messy than glue
- Doesn’t damage fabric if done correctly
- Great for small sagging areas
Cons:
- Only works if original glue still has strength
- Results usually last just a few months
Verdict: A decent mid-level DIY solution, ideal for small bubbles or early-stage sagging.
Fix #4: Adhesive Spray and Partial Reattachment (Good and Durable)
This method is one of the most effective DIY fixes. Automotive-grade Headliner repair adhesive sprays are heat-resistant and designed to bond fabric to foam or board surfaces.
How it’s done:
- Gently peel back the sagging fabric.
- Clean the surface beneath with a dry cloth or brush.
- Apply an even coat of adhesive spray to both surfaces.
- Wait 30–60 seconds for tackiness, then press the fabric back into place.
- Smooth it with a roller to remove bubbles.
Pros:
- Professional-looking results
- Long-lasting if done correctly
- Works on large sagging areas
Cons:
- Requires care and patience
- Fumes can be strong—use in a ventilated space
- Doesn’t fix foam deterioration beneath the surface
Verdict: A good long-term solution if the foam is still intact. Affordable, effective, and clean when done right.
Fix #5: Full Headliner Replacement (Best and Permanent)
If your Headliner repair is beyond saving—foam crumbling, fabric stained, or adhesive gone—then a full replacement is the ultimate fix. It’s the only way to restore that factory-new appearance and ensure longevity.
How it’s done:
- Remove all trim panels, visors, dome lights, and grab handles.
- Gently lower and remove the headliner board.
- Scrape off the old foam and adhesive completely.
- Apply new foam-backed headliner fabric using heat-resistant adhesive.
- Reinstall everything carefully.
Pros:
- Factory-level finish and durability
- Eliminates odors, stains, and sagging
- Increases resale value of your car
Cons:
- Time-consuming (2–3 hours)
- Slightly expensive ($150–$450 professionally, $70–$120 DIY)
Verdict: The best and most permanent fix. Ideal for older vehicles or those you plan to keep long-term.
Bonus: Professional vs DIY — Which Should You Choose?
| Option | Cost | Durability | Time | Skill Level |
|---|---|---|---|---|
| Thumbtacks/Glue | $5–$10 | 1–2 months | 10 mins | Very Easy |
| Steam Fix | $20–$40 | 2–6 months | 30 mins | Easy |
| Adhesive Spray | $40–$70 | 1–3 years | 1–2 hrs | Moderate |
| Full Replacement (DIY) | $70–$120 | 5–8 years | 2–3 hrs | Moderate |
| Professional Replacement | $200–$450 | 8–10 years | N/A | Expert |
If your vehicle is older and you want a fast solution, the adhesive spray method is a good balance between cost and longevity. However, if you’re restoring a valuable car or want a clean, long-term solution, professional replacement is worth every dollar.
Preventing Future Headliner repair Damage
Once repaired, you’ll want to keep your new or fixed Headliner repair in great condition. Follow these tips:
- Avoid prolonged heat exposure. Park in shade or use a windshield sunshade.
- Fix leaks immediately. Water and moisture quickly ruin foam backing.
- Clean gently. Use a soft brush or microfiber cloth; avoid soaking the fabric.
- Don’t smoke inside. Nicotine and tar weaken adhesives and discolor the liner.
- Maintain ventilation. Keep windows slightly open in hot weather to reduce trapped heat.
These habits can add years to your headliner’s life.
Common Mistakes to Avoid
- Using regular glue: Household glues can melt or harden under heat, causing bubbles.
- Skipping surface prep: Adhesive won’t stick properly to dirty or flaky foam.
- Over-saturating fabric: Too much spray adhesive can cause stains or wrinkles.
- Ignoring leaks: Roof leaks will ruin even a perfect repair within weeks.
Proper prep and patience go a long way toward a professional-looking result.
Conclusion
A sagging Headliner repair doesn’t mean your car’s interior is beyond saving. From quick DIY patches to complete replacements, there’s a fix for every budget and skill level.
While thumbtacks and glue can serve as last-minute band-aids, the best results come from a full replacement or a quality adhesive reattachment. Whichever route you choose, tackling your headliner repair promptly can improve your driving experience, restore comfort, and even boost resale value.
Take your time, choose the right materials, and follow the steps carefully — and you’ll go from “bad” to “best” in no time.
FAQs
1. What’s the best glue for headliner repair?
Automotive-grade adhesives such as 3M Headliner and Fabric Spray Adhesive or Permatex Body Shop Heavy Duty Adhesive work best because they can handle high heat and humidity.
2. Can I fix a sagging headliner without removing it?
Yes, small sections can be fixed using adhesive spray or twist pins, but full sagging usually requires removing and reapplying the fabric properly.
3. How long does a headliner repair last?
DIY adhesive repairs typically last 1–3 years, while professional replacements can last 8–10 years with proper care.
4. How much does it cost to fix a car headliner?
Costs range from $20 for DIY adhesive fixes to $450 for professional full replacements, depending on the vehicle and materials used.
5. What causes a car headliner to sag?
The main causes are heat, humidity, aging foam, and weakened adhesives. Over time, these factors cause the fabric to detach from the ceiling board.
6. Is it worth repairing a car headliner?
Absolutely. Repairing the headliner improves appearance, comfort, and resale value — making it a smart, affordable upgrade.
7. Can I use a fabric steamer to fix my headliner?
Yes, for small sagging areas. Steam reactivates the old adhesive temporarily, but it’s not a permanent solution.